Elegance and grace are the names that I would like to use as
synonyms for this cake. Its sheer beauty is strikingly enough for the crowd to
woo your baking skills.
However, it doesn't really need that much for care to bake
this. All you need is a little bit of patience and of course the most important
ingredient of all – Love
You can bake this for anniversaries, birthdays and even
Valentine’s Day.
Few things to remember: I used something that I would like
to call a “Mock Cream Cheese”.
However please feel absolutely free to use cream
cheese frosting instead of my mock cream cheese.
Living in a place of limited
supply, I do need to make adjustments, thereby trying to replicate.
If you are not fond of cream cheese, it’s perfectly okay to
just use butter cream. Again, I used an egg less version for the sponge, you
can always opt for the regular sponge.
For the butter cream I land up using the same amounts of
butter to confectioner’s sugar, however, if you wish you can always use more
but I do not recommend using less.
For the cake:
1 cup flour
2tbsp cocoa powder
1 tsp baking powder
½ tsp baking soda
Pinch of salt
1 cup plain bottled soda water
100 gms softened butter
1 can sweetened condensed milk
¼ cup red food color
Sift the baking powder, soda, flour, cocoa powder and salt
and set aside.
In a mixing bowl, beat the butter until it’s light, fluffy
and pale. Add the condensed milk and combine. Alternately, starting with the
dry ingredients, add the flour mixture and the cup of soda. Sometimes you might
need a little extra soda; the batter should be dropping consistency. Mix the color once all the ingredients are
properly combined.
Bake this in a round loose bottomed 8 inch cake tin for
about 45-50 minutes. Do check the doneness after 45 minutes. Depending on the
oven, the time may vary.
Once done, let it cool for about 15 minutes before cutting
the cake in three equal portions for the icing. Let it cool completely.
For the filling:
100grams butter
100 grams icing sugar
¼ cup melted cheese
Beat the softened butter and the sifted icing sugar until
its extremely pale, thick and fluffy. It should take about a good 10-15 minutes
to achieve this.
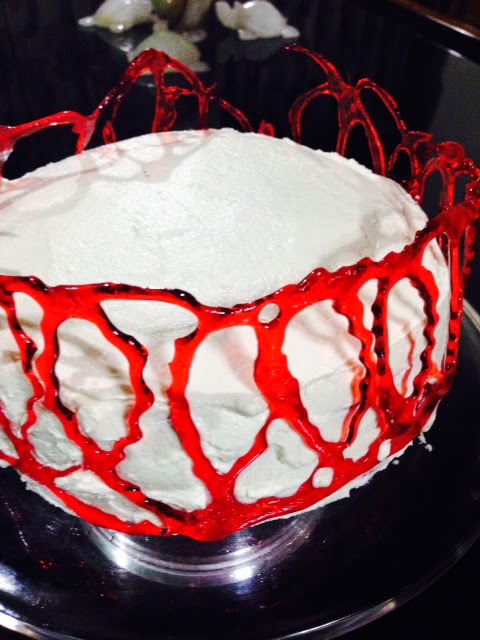
For the caramel:
I find it particularly difficult to explain how to make any
decorations using caramel. I used a cup of castor sugar with a tad bit of
water. Once it started becoming amber, I added red food color to it.
I made the rings on a silicone baking sheet and while it was
still a little soft, I peeled it off and molded it around the cake.
It doesn’t really add much to the flavor of the cake but it
definitely gives it sheer chic elegance!
Assembly:
Spread a layer of cheese butter cream on the cake slice.
Sandwich it with the next layer repeating the same. Top it with the last layer
of cake and spread the icing evenly on the whole cake, covering nooks and
crannies. Once evenly covered with butter cream, mold the caramel rings onto
it. Set it in the fridge for few minutes in case the butter cream becomes too
soft.
.jpeg)
.JPG)
.JPG)


